
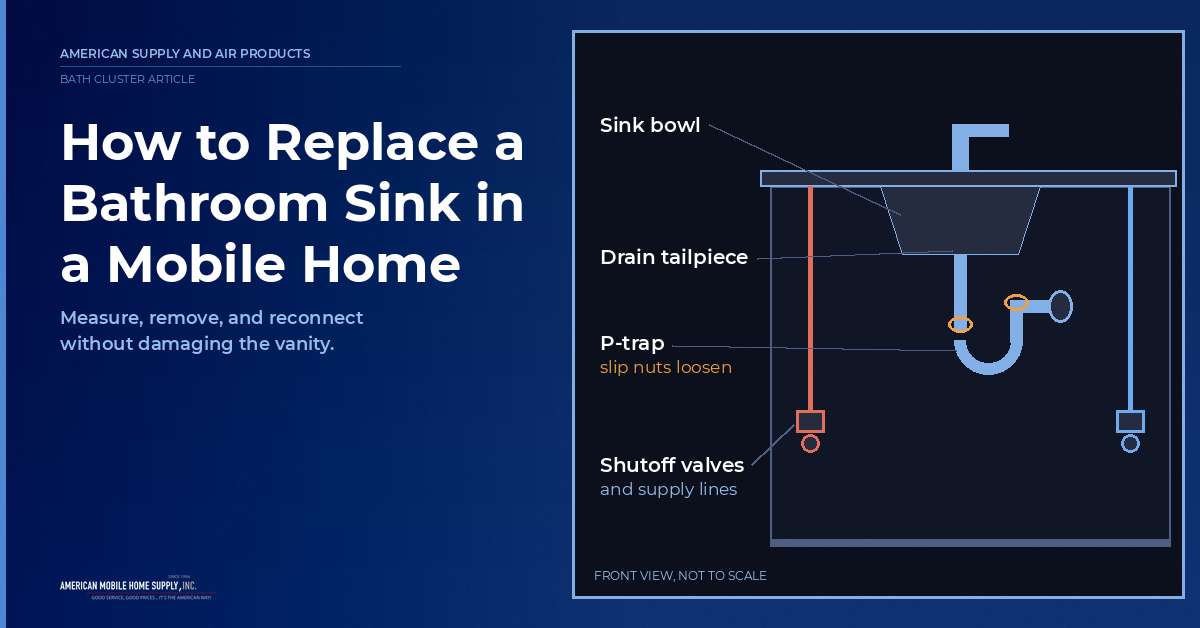
A mobile home bathroom sink can look just like a regular bathroom sink until you try to replace it. The bowl may be made from thin molded plastic instead of porcelain, the overflow may be a narrow slot instead of a round opening, and the sink itself may be smaller than the ones you normally see at a hardware store.
That is why, when you work out how to replace a bathroom sink in a mobile home, it is not always as simple as pulling out the old sink and dropping a new one into the same spot.
Before ordering anything, identify the sink you have, measure the opening, and check the drain and water connections underneath. A few measurements up front can save you from having a new sink sitting in the box because it does not fit.
If you’re wondering what are mobile home bathroom sinks made of, there are a few common materials to look for.
Plastic is common, especially in older mobile homes. These sinks are lightweight and can flex during removal, but that also means they can crack if you put too much pressure on one area.
Cultured marble is a resin-based material that can be molded into the sink and countertop as one piece. It is heavier and more solid than plastic, but it can chip if you hit it with a tool.
Vitreous china is the same type of ceramic material commonly found in traditional house bathrooms. It is heavier than plastic and cultured marble and tends to feel more like a standard residential sink.
Material at a glance
If you want to know how to measure for a mobile home bathroom sink, start with the opening in the vanity top rather than measuring only the old sink.
Measure the:
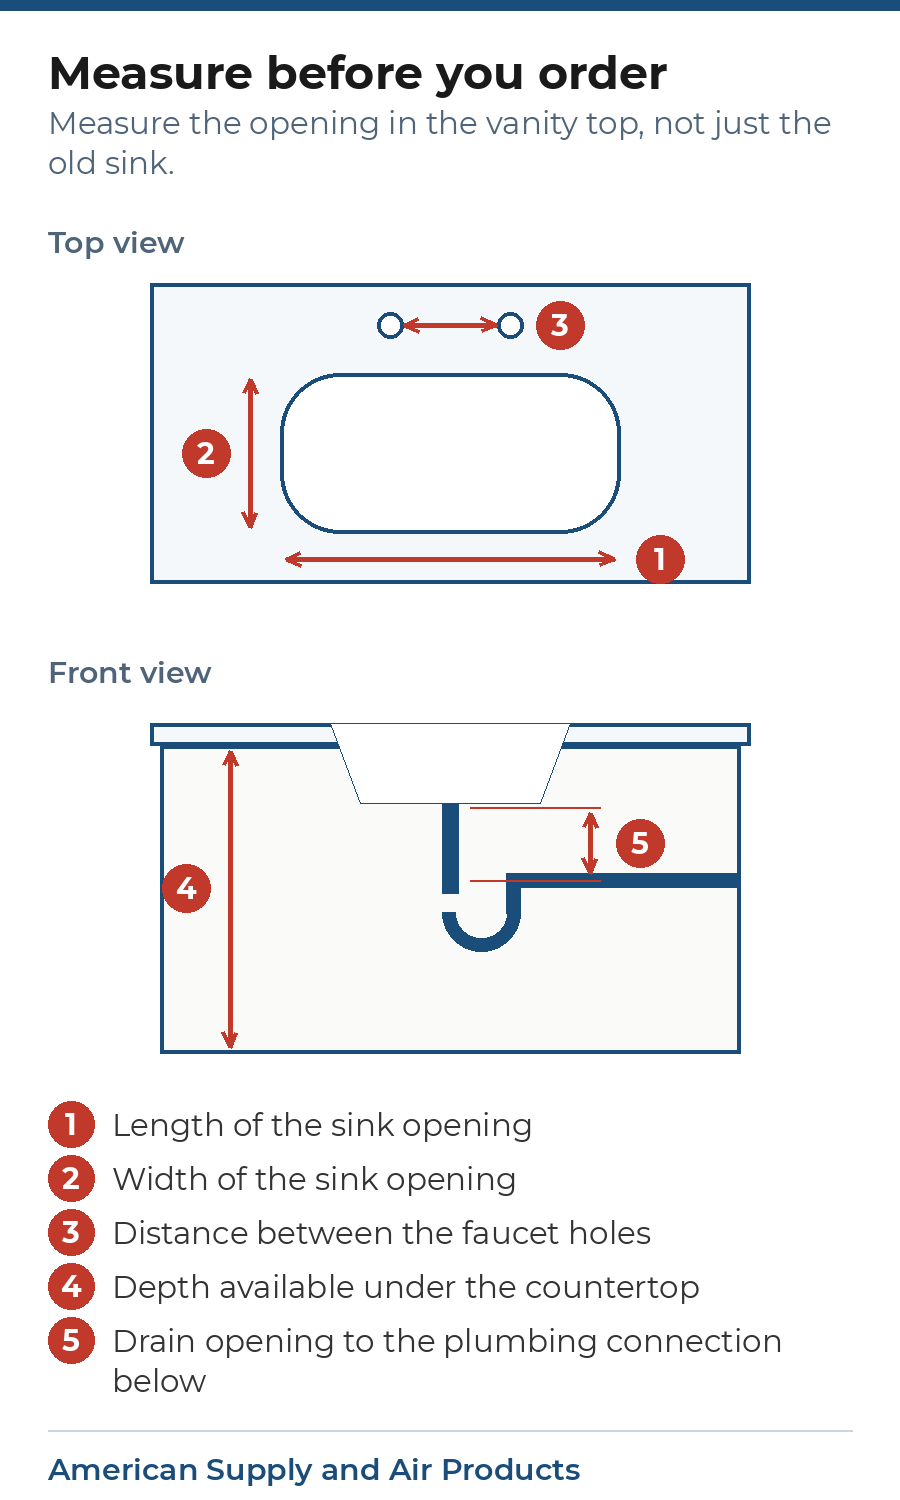
Write the measurements down before you start comparing replacements. It is surprisingly easy to remember a measurement incorrectly once you have several sink listings open.
Pay particular attention to the cutout. If the replacement sink is wider than the opening, it will not drop into place. If it is smaller, you may end up with an obvious gap around the edge.
If you are replacing the vanity top at the same time, you have more flexibility because the new opening can be made for the replacement sink. If the existing vanity top is staying, however, the sink needs to match the opening you already have.
You can compare mobile home bathroom sinks based on their bowl dimensions, mounting style, and available openings before choosing one.
Once you know the replacement will fit, shut off the hot and cold water under the sink.
Put a bucket underneath the plumbing before disconnecting anything. There will usually be some water left inside the drain and supply lines, even after the valves are closed.
The exact removal process depends on how the sink is attached. Some sinks use clips underneath the vanity top. Others are held in place with silicone or plumber’s putty around the rim.
Do not try to force a sink upward if it is still sealed to the countertop. Break the seal first. This is especially important with a plastic sink, which can crack if you put too much pressure on one side.
Six steps, in order
That last check is worth the extra minute. Water often collects around the edge of a bathroom sink, especially if the old seal has been leaking for a while.
If the vanity top is made from particleboard and the edge has started swelling or coming apart, deal with that before installing the new sink. Otherwise, you could be putting a brand-new sink on a surface that is already failing underneath it.
How to install a bathroom sink in a mobile home comes down to the order of the connections. Reconnect the drain and P-trap first, then connect the hot and cold supply lines.
Tighten mobile home bathroom sink connections by hand first, then give them a small additional turn with pliers if needed. Do not crank down on plastic fittings or compression connections.
Once everything is connected, turn the water back on slowly.
Run the faucet and let the water drain while checking underneath the sink. Look at every connection, not just the one you worked on. A small leak can take a few seconds to appear. For help with the plumbing, fixtures, and more, the mobile home bathroom guide covers the bigger picture.
A mildewing sink is usually a seal problem, not a sink problem
A sink that starts mildewing a few weeks after a swap is rarely the sink material itself. It is usually the drain seal, either the putty under the flange drying out or the P-trap gasket seated slightly off. Pull the trap, clean both surfaces, and reseat with fresh plumber’s putty before assuming the whole install needs to be redone.
A slow drip at the supply valve rather than the drain points somewhere different. Compression fittings on older shutoff valves lose their seal gradually rather than all at once, so a valve that seemed fine during the install can start weeping weeks later as the compression ring settles. Snugging the compression nut a quarter turn usually solves it; if it does not, the valve itself has likely reached the end of its life and is worth replacing rather than repeatedly tightening.
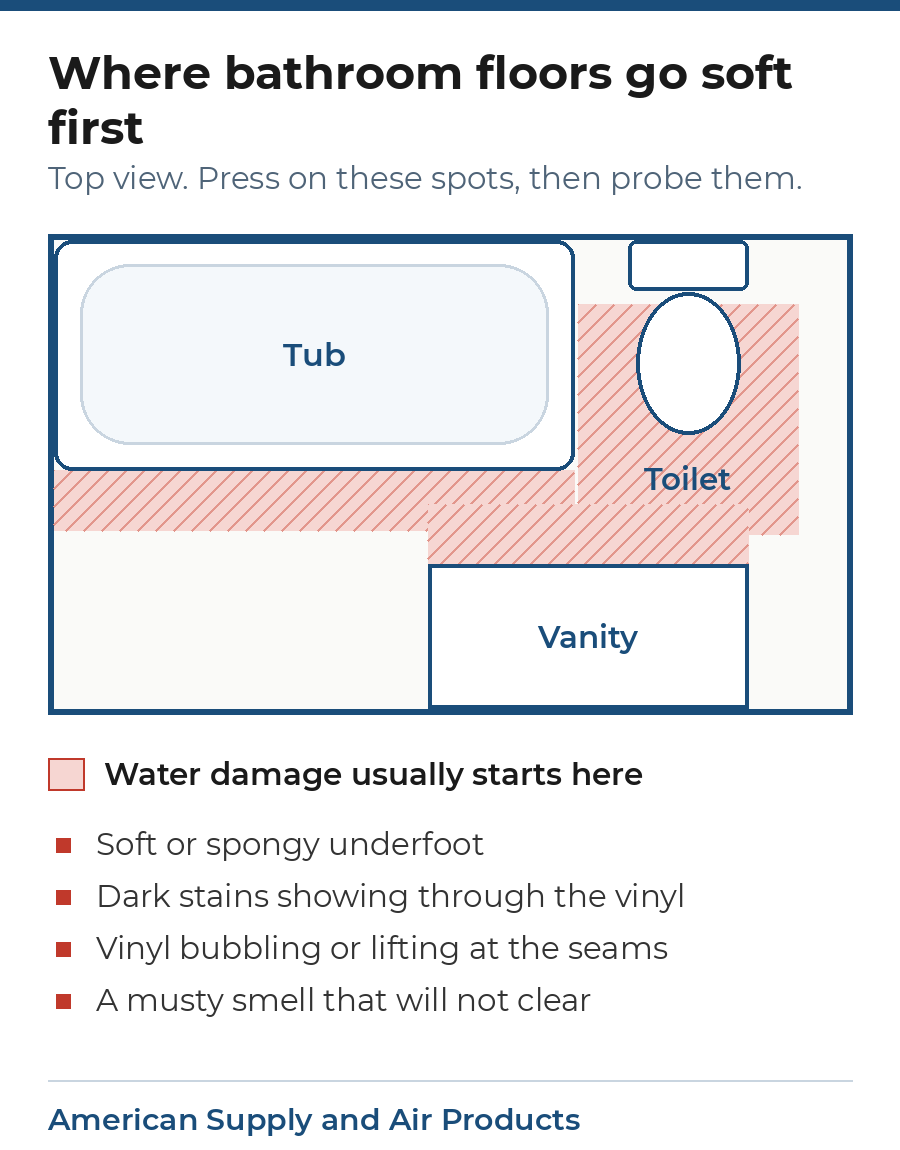
If water had been sitting under the sink for a while before you noticed the leak, check the floor beneath the vanity while everything is disconnected. Mobile home bathroom floor replacement covers what to do if the subfloor has already started to soften from a slow drip that went unnoticed.
Browse mobile home parts at American Supply and Air Products, or call 1-800-368-6208 for help matching drain and supply connections before you order.


